Docker Hub Quickstart
Estimated reading time: 3 minutes
Docker Hub is a service provided by Docker for finding and sharing container images with your team. It is the world’s largest repository of container images with an array of content sources including container community developers, open source projects and independent software vendors (ISV) building and distributing their code in containers.
Users get access to free public repositories for storing and sharing images or can choose a subscription plan for private repositories.
Docker Hub provides the following major features:
- Repositories: Push and pull container images.
- Teams & Organizations: Manage access to private repositories of container images.
- Docker Official Images: Pull and use high-quality container images provided by Docker.
- Docker Verified Publisher Images: Pull and use high- quality container images provided by external vendors.
- Builds: Automatically build container images from GitHub and Bitbucket and push them to Docker Hub.
- Webhooks: Trigger actions after a successful push to a repository to integrate Docker Hub with other services.
Docker provides a Docker Hub CLI tool (currently experimental) and an API that allows you to interact with Docker Hub. Browse through the Docker Hub API documentation to explore the supported endpoints.
The following section contains step-by-step instructions on how to easily get started with Docker Hub.
Step 1: Sign up for a Docker account
Let’s start by creating a Docker ID.
A Docker ID grants you access to Docker Hub repositories and allows you to explore images that are available from the community and verified publishers. You’ll also need a Docker ID to share images on Docker Hub.
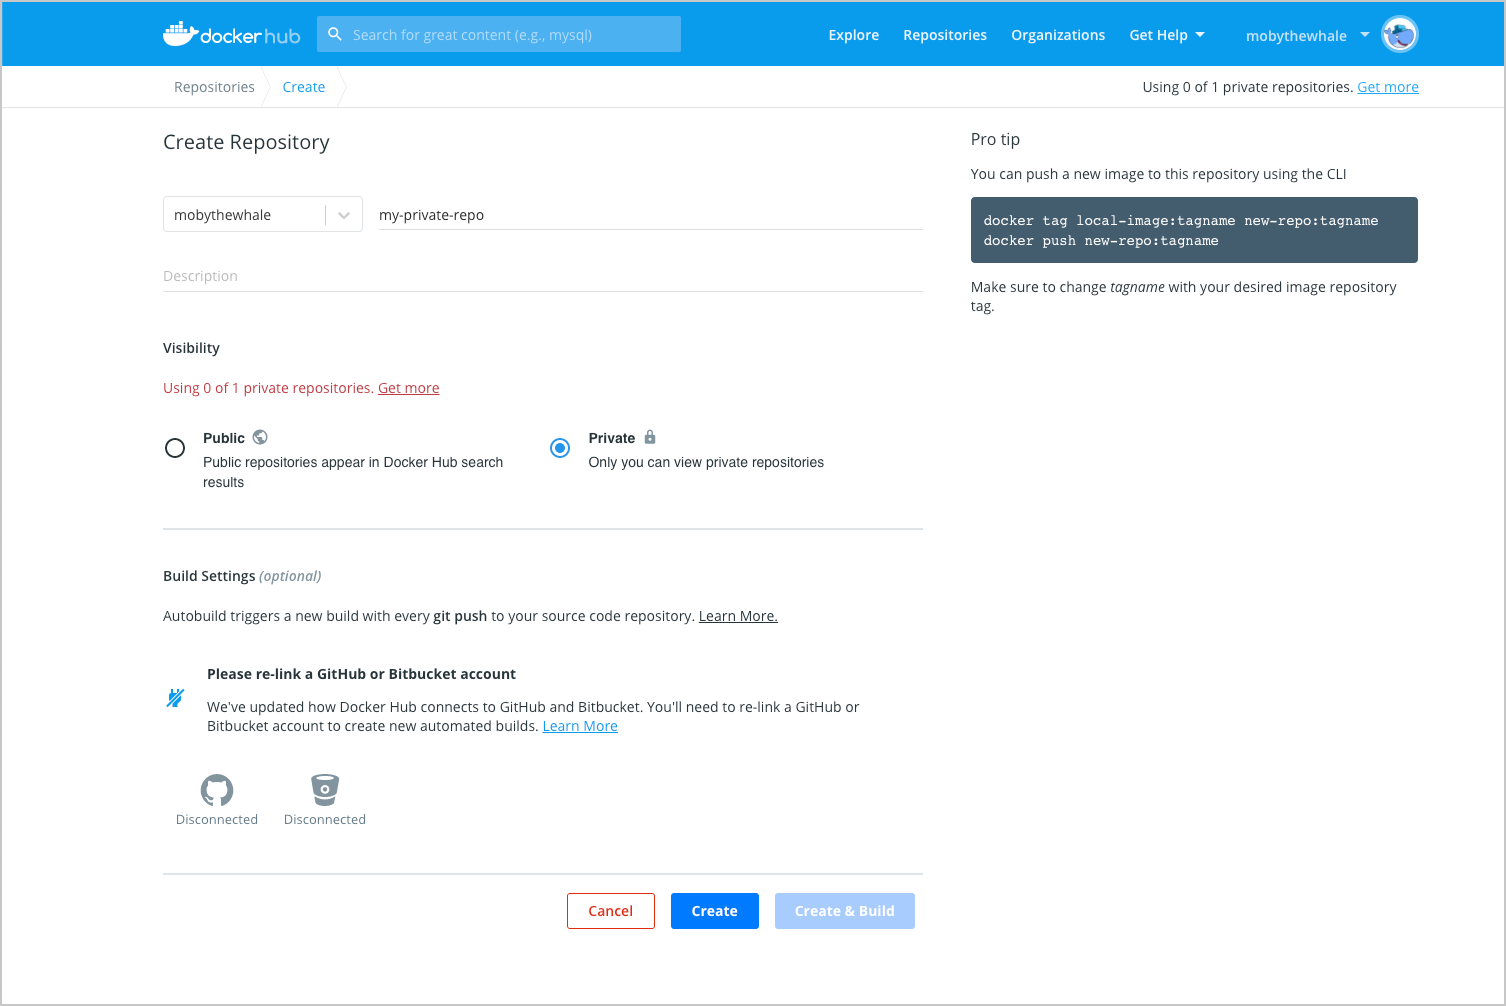
Step 2: Create your first repository
To create a repository:
- Sign in to Docker Hub.
- Click Create a Repository on the Docker Hub welcome page:
- Name it <your-username>/my-private-repo.
-
Set the visibility to Private.
-
Click Create.
You’ve created your first repository. You should see:

Step 3: Download and install Docker Desktop
We’ll need to download Docker Desktop to build and push a container image to Docker Hub.
-
Download and install Docker Desktop. If on Linux, download Docker Engine.
-
Sign into the Docker Desktop application using the Docker ID you created in Step 1.
Step 4: Build and push a container image to Docker Hub from your computer
-
Start by creating a Dockerfile to specify your application as shown below:
# syntax=docker/dockerfile:1 FROM busybox CMD echo "Hello world! This is my first Docker image." -
Run
docker build -t <your_username>/my-private-repo .to build your Docker image. -
Run
docker run <your_username>/my-private-repoto test your Docker image locally. -
Run
docker push <your_username>/my-private-repoto push your Docker image to Docker Hub. You should see output similar to: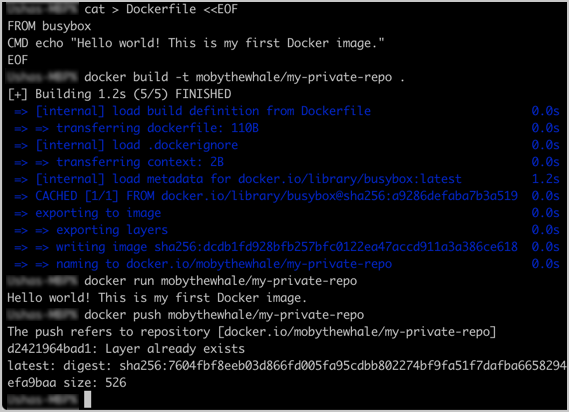
Having trouble pushing? Remember, you must be signed into Docker Hub through Docker Desktop or the command line, and you must also name your images correctly, as per the above steps.
-
Your repository in Docker Hub should now display a new
latesttag under Tags: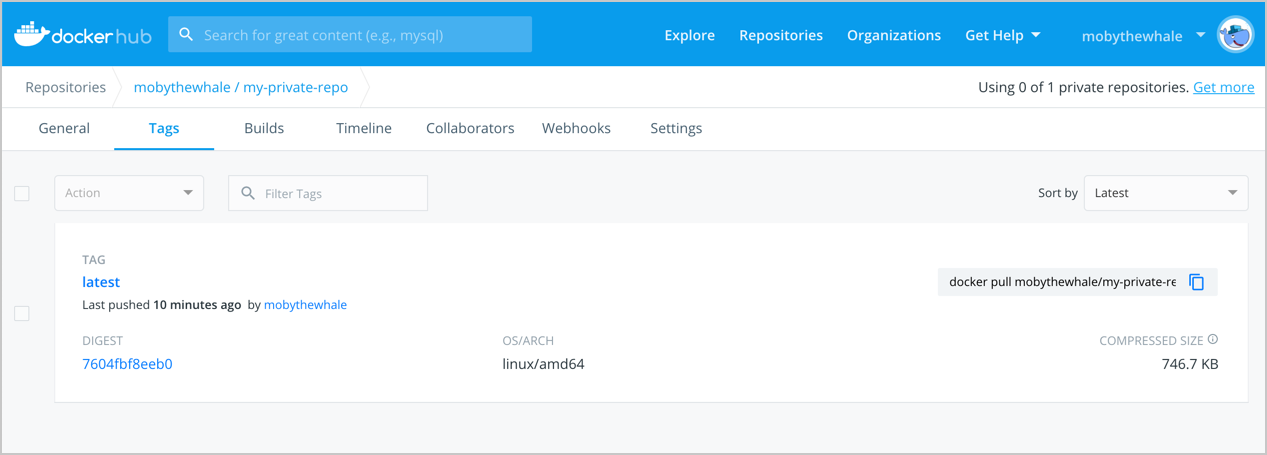
Congratulations! You’ve successfully:
- Signed up for a Docker account
- Created your first repository
- Built a Docker container image on your computer
- Pushed it successfully to Docker Hub
Next steps
- Create an organization to use Docker Hub with your team.
- Automatically build container images from code through builds.
- Explore official & publisher images.
- Upgrade your subscription to push additional private Docker images to Docker Hub.